First, you will need an Amazon acount and you can find how to create your account here. New Amazon users are eligible for a free tier which provides a free micro instance for a year. Once you log in to the AWS Console, go to the EC2 tab and launch a new Instance. You can locate the BitNami LAMP Stack image by searching in the Community AMIs tab for "lampstack-5.3.8-2", that is the latest version at the time of this writing. I you want to run it using the free tier plan, you should run the 32bit or 64bit EBS AMI.
 |
| Launching BitNami LAMPStack from the AWS Console |
Another option is to launch directly from the BitNami website. You can select your preferred region (United States, Europe, Asia or South America) and the architecture (32 or 64 bits) and click on the appropriate link.
Then, you can set different parameters from the AWS Console: availability zone, ssh key, the image type (micro, small, medium) and the security group. Once the machine is started, access it by typing the public DNS name in a browser and you should see a welcome page for BitNami LAMPStack.
Now it is time to connect to the machine. You can download the private SSH key from your Amazon account. If you want to connect to the machine from Windows using the popular tool Putty, you will need to convert your private key to the .PPK format. Take a look at this tutorial if you are not sure how to perform this conversion.
On Linux or OS X, you can open a Terminal and run the following command:
$ ssh -i /path/to/your/private/key.pem bitnami@ec2-xx-xx-xx-amazonaws.com
You will see a welcome message similar to:
 |
| BitNami welcome message |
ctlscript.sh: It is the main script to start and stop the servers.
frameworks/cakephp: The CakePHP framework files.
apache2: The Apache server files.
php: The PHP language files.
mysql: The MySQL database files.
One of the advantages of this structure is that you can install the BitNami LAMP Stack on your own desktop machine, develop your application locally and then migrate the full directory directly to the cloud.
You can edit the files online with a command line editor (nano, vim, emacs) but many people prefer to edit files with a graphical editor locally. Using an SFTP client like FileZilla, you can edit the files from your computer. If you need help, see our how-to for configuration instructions.
Edit the Apache configuration file /opt/bitnami/apache2/conf/httpd.conf and uncomment the following line at the end of the file:
Include "/opt/bitnami/frameworks/cakephp/conf/cakephp.conf"
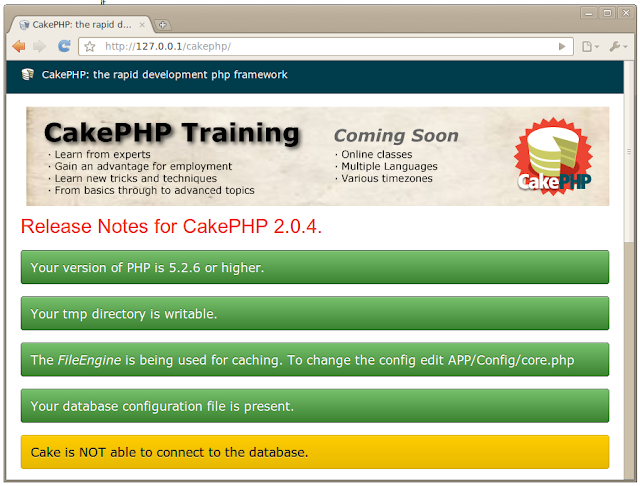
Restart the Apache server and visit the CakePHP welcome page at http://ec2-xx-xx-xx-amazonaws.com/cakephp
$ sudo /opt/bitnami/ctlscript.sh restart apache
 |
| CakePHP welcome page |
That's all! You can now create your CakePHP application in the Amazon cloud. Notice that you should modify the default encryption keys in the "/opt/bitnami/frameworks/cakephp/app/Config/core.php" file:
Configure::write('Security.salt', '');
Configure::write('Security.cipherSeed', '');
If your applications are going to use a database (and they probably will), you can edit the database settings at "/opt/bitnami/frameworks/cakephp/app/Config/database.php". BitNami LAMP Stack also ships the phpMyAdmin tool that you can use it to manage your MySQL database. If you need help, check our how-to for access instructions.
